babylab.mcmaster.ca · Lab guides

EyeLink Setup & Troubleshooting

Configuration · launching · positioning · thresholds · calibration & validation · 17 sections · updated Nov 5, 2026

Eye tracking only works as well as the eye images it gets. The tracker has no autofocus: image quality depends on the right camera configuration, where the participant sits, and how the thresholds are set. Work through this page in order before every session, and keep checking while the study runs.

Keys at the host PC
  • CStart calibration
  • VStart validation
  • ReturnAccept a fixation (calibration, validation, drift check)
  • OStart the experimental trials
  • ↑↓Pupil threshold, selected eye
  • +−CR threshold, selected eye
What the colours mean
  • Blue: counted as pupil
  • Cyan: counted as corneal reflection
  • Purple panel: eye being adjusted
  • Green: detected / OK / GOOD
  • Red: lost or moving: fix first

1Before the session

1.1

The whole procedure

An eye tracker is a specialised camera. It takes hundreds of pictures of the eyes every second and turns each one into a point on the screen, using the shape of the pupil and the position of a small reflection on the cornea. Every step below exists to give it sharp, well-lit, correctly read eye images, and then to teach it how this particular person's eyes map onto the screen.
EyeLink session setupFlowchart. Open Camera Setup and confirm the configuration reads Arm Remote Bino/Mono with a 16 mm lens, loading it from Set Options if not. Position the participant, tune thresholds for each eye, calibrate, then validate; if either eye is not GOOD, recalibrate. When both are GOOD, start the trials. Open Camera Setup Right configuration?Arm Remote · 16 mm NO Load itSet Options → Config CHECK AGAIN YES Position the participantCentred · 500–700 mm · sharp Tune thresholdsPupil, then CR · each eye Calibrate [C]Pattern matches the targets Validate [V]Both eyes GOOD? NO RECALIBRATE YES Start trials [O]
Configuration first. Thresholds tuned under the wrong configuration, or a calibration done before the person is settled, won't hold up.
1.2

Check the configuration

Key points
  • The host PC can load several eye-tracker configurations. Only one matches our setup.
  • The correct one is Arm Remote Bino/Mono, 16 mm lens.
  • The wrong one causes tracking difficulties and inaccurate data for the whole study.

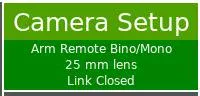
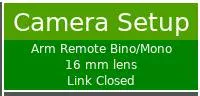
Look at the green box in the top-right corner of the Camera Setup screen. It shows the configuration loaded right now. Check both lines: the mount (Arm Remote Bino/Mono) and the lens (16 mm lens).

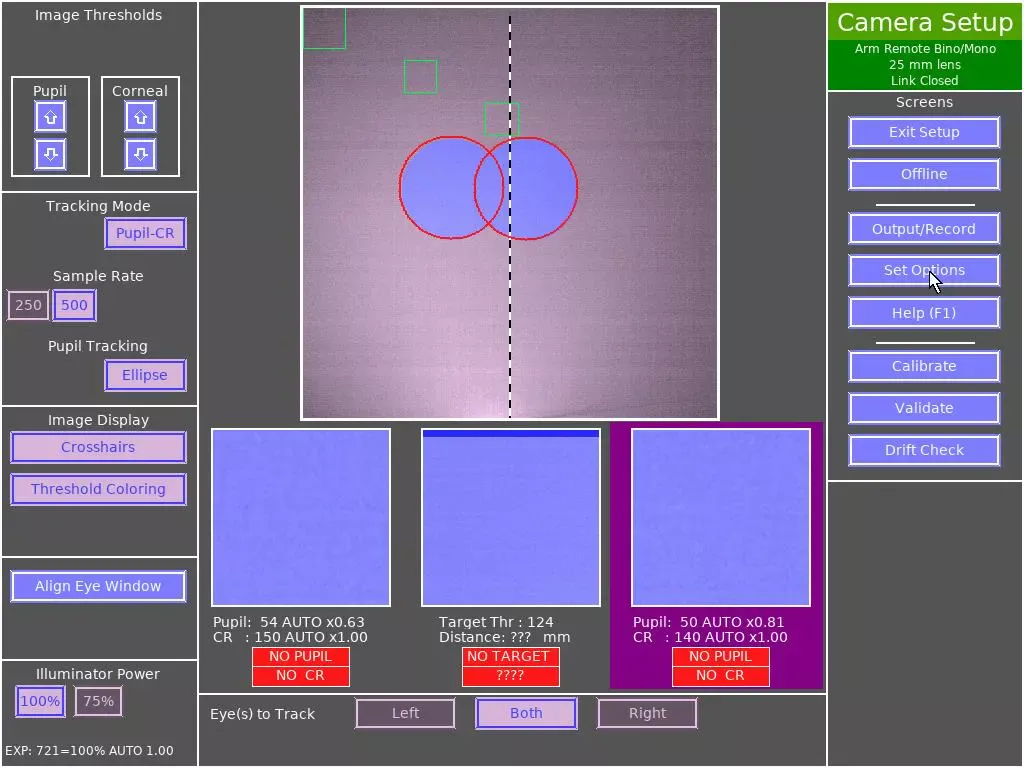
Camera Setup header reading Arm Remote Bino/Mono, 25 mm lens
✕ Wrong lens

Mount is right, but it says 25 mm lens.

Camera Setup header reading Arm Remote Bino/Mono, 16 mm lens
✓ Correct

Arm Remote Bino/Mono and 16 mm lens.

If both lines match, go on to positioning. If either is different, load the right configuration first.

1.3

Load the right configuration

Key points
  • Set Options → Select Config… → Arm Mount (Remote mode), Binoc/Monoc → Accept → 16 mm → Camera Setup.
  • The configuration and the lens are set separately. Picking the configuration alone is not enough.
  1. On the Camera Setup screen, click Set Options in the right-hand column.

    Camera Setup screen with the header showing 25 mm lens and the Set Options button highlighted
    The header (red) shows a 25 mm lens, so this configuration is wrong. Click Set Options. Click any screenshot to enlarge.
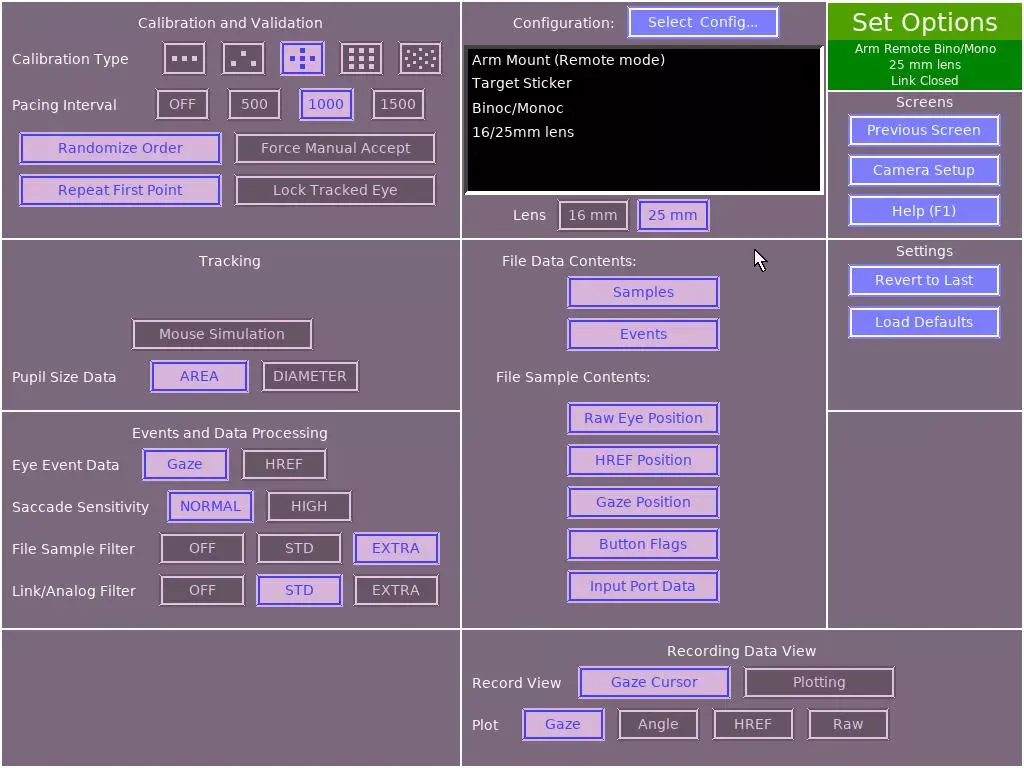
  2. On Set Options, click Select Config… at the top of the middle column.

    Set Options screen with the Select Config button highlighted
    Note the Lens buttons below the list: 25 mm is selected here (red). You'll change it in step 4.
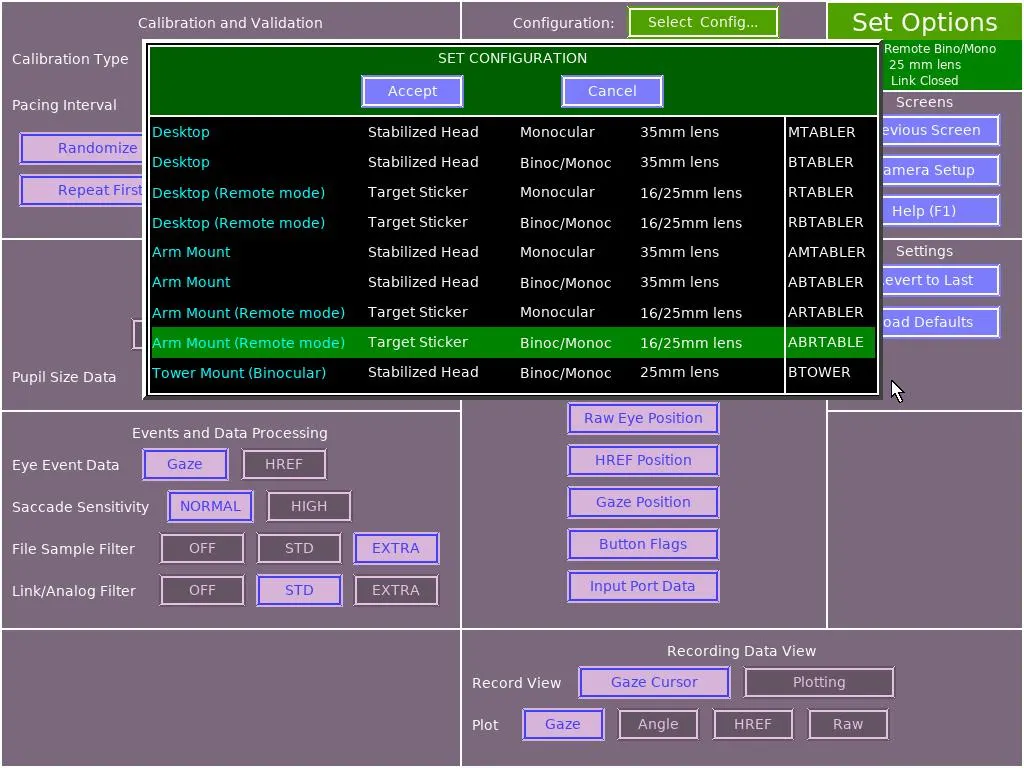
  3. In the Set Configuration list, click Arm Mount (Remote mode) · Target Sticker · Binoc/Monoc · 16/25mm lens (code ABRTABLE), then click Accept.

    Set Configuration list with Arm Mount (Remote mode), Binoc/Monoc highlighted in green and the Accept button
    Not the Monocular row just above it, and not the plain Arm Mount rows (those are for a stabilised head).
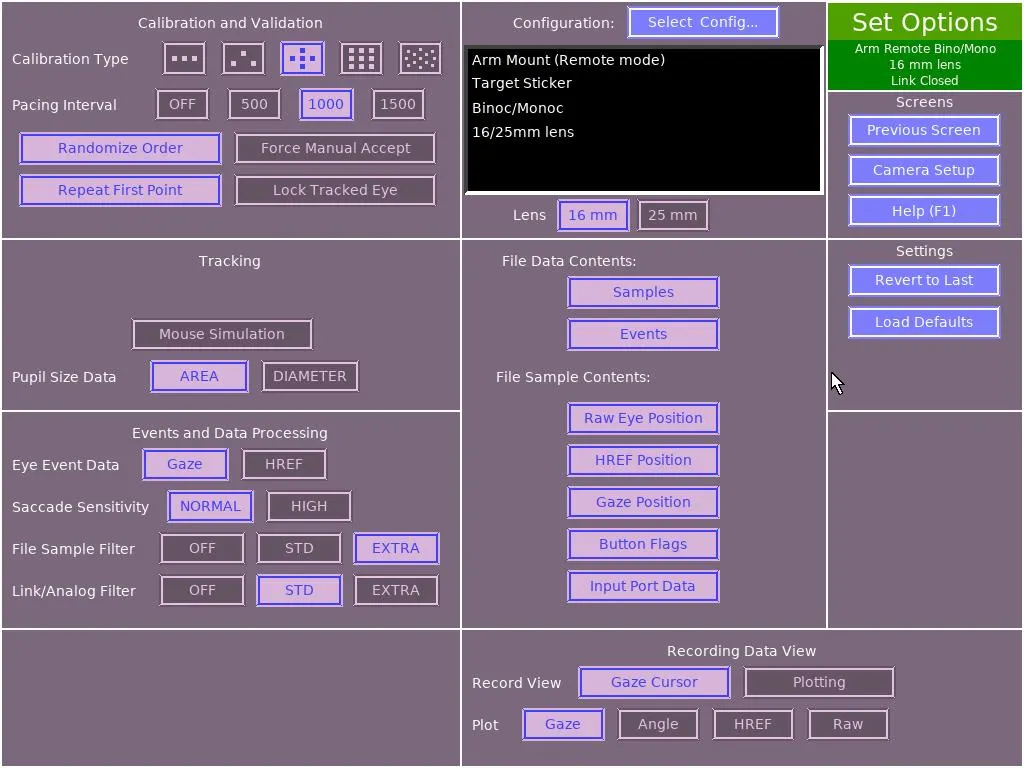
  4. Back on Set Options, click the 16 mm lens button. Then click Camera Setup on the right to leave the options screen.

    Set Options screen with 16 mm lens selected and the Camera Setup button highlighted
    The header now reads 16 mm lens. Click Camera Setup to go back.
  5. On Camera Setup, check the green header again (1.2) before going on.

1.4

Launch the study program

Key points
  • Studies are run from Visual Studio Code (VS Code): open the project folder, then run the program in its terminal.
  • PsychoPy studies run on the Windows PC; Psychtoolbox (Octave) studies run on the Linux PC.
  • Write down the participant ID shown in the welcome window before you click OK.

PsychoPy studies Windows

  1. Open Visual Studio Code.

  2. Open your project folder with File → Open Recent… and pick the folder with your project's name.

  3. Open a terminal with View → Terminal. A terminal panel appears at the bottom of the window.

  4. Click in the terminal and press ↑ to step back through earlier commands until you find the one that runs your study's program file. Press Return to run it.

  5. A welcome window opens with key information about the session, including the participant ID. Write the ID down, then click OK to start the program.

Psychtoolbox studies Linux

  1. Open Visual Studio Code from the Dock.

  2. Open your project folder with File → Open Recent… and pick the folder with your project's name.

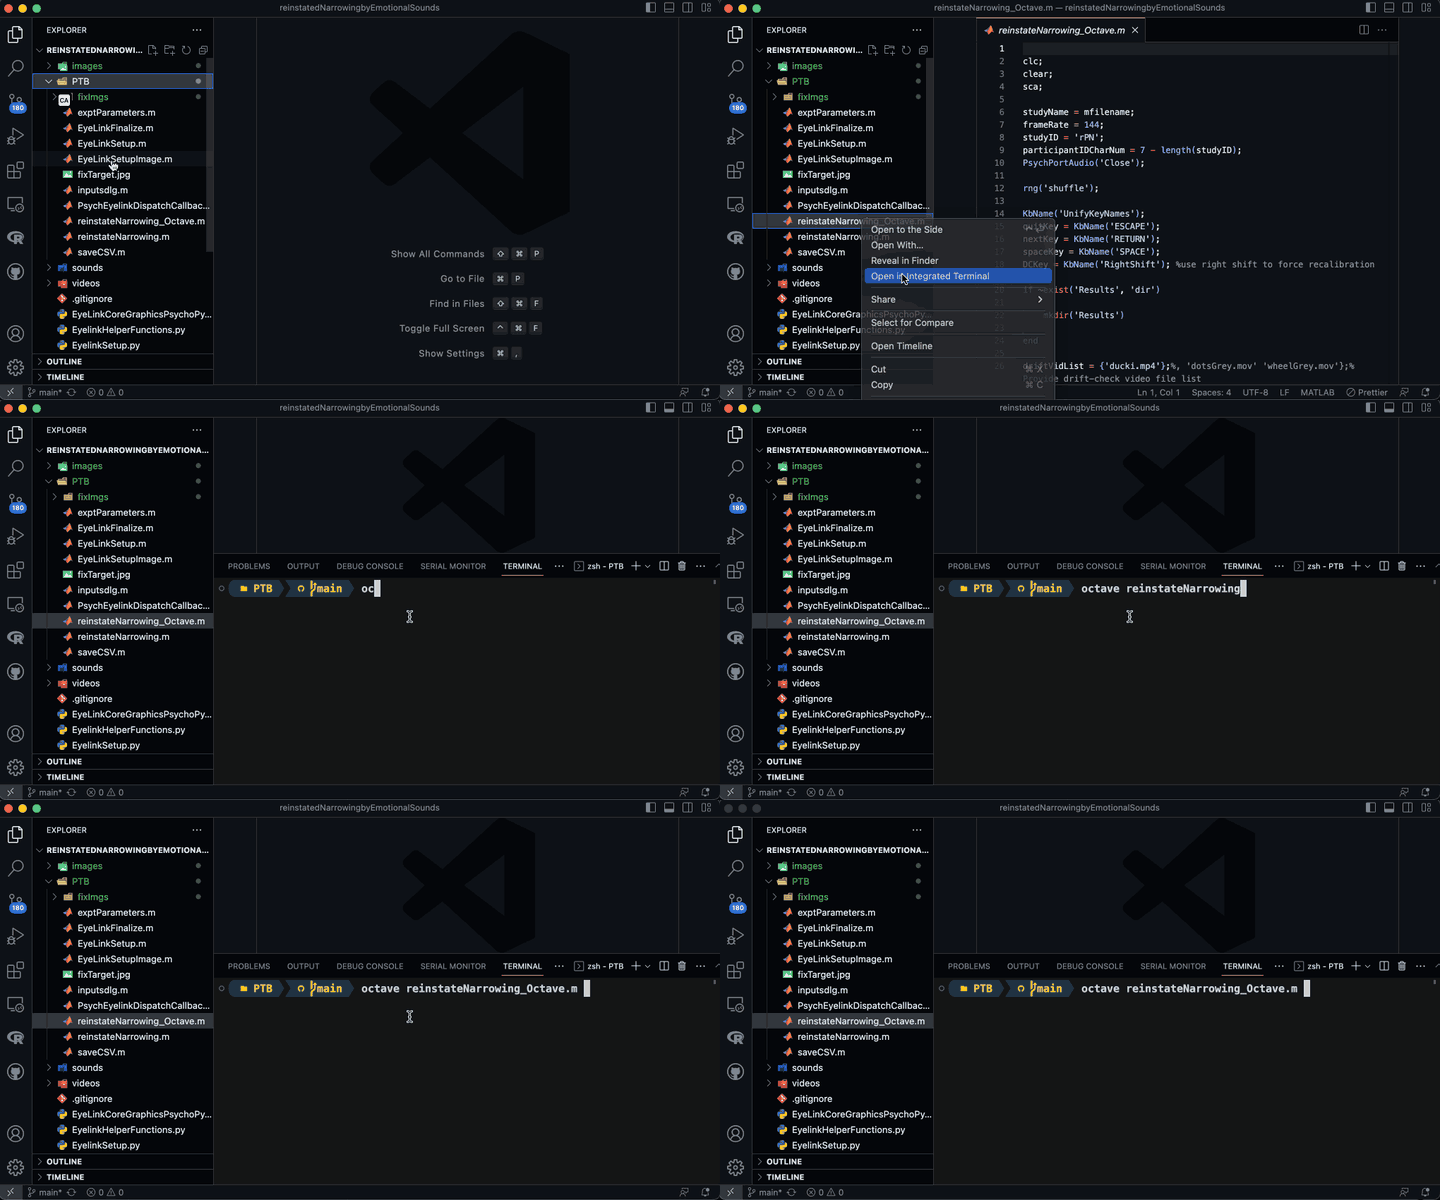
  3. In the file list, right-click the program file (the one ending in _Octave.m) and choose Open in Integrated Terminal.

  4. In the terminal, type octave followed by the program file name, then press Return. For example:

    $ octave faceDetection_Octave.m
Watch the Octave launch (20-second demo)Screen recording: opening the project in VS Code, right-clicking the Octave program file, choosing Open in Integrated Terminal, and running it with octave
Next: once the program is running and connected to the eye tracker, seat the participant and work through positioning, thresholds and calibration. When everything passes, press O to start the trials.

2Position the participant

2.1

Centre and distance

Key points
  • Head in the centre of the tracking area, facing the screen, not tilted.
  • Distance 500–700 mm, read from the eye tracker screen. Outside that range the eyes go out of focus.
  • The target sticker and both eyes are detected steadily, with no flickering.

Participants don't know what the tracker needs, so tell them (or, for babies, tell the parent holding them). Do this before touching the thresholds: thresholds set while someone is slouched or too close won't hold once they move.

  1. Seat them comfortably and upright, facing the monitor. A comfortable participant moves less.

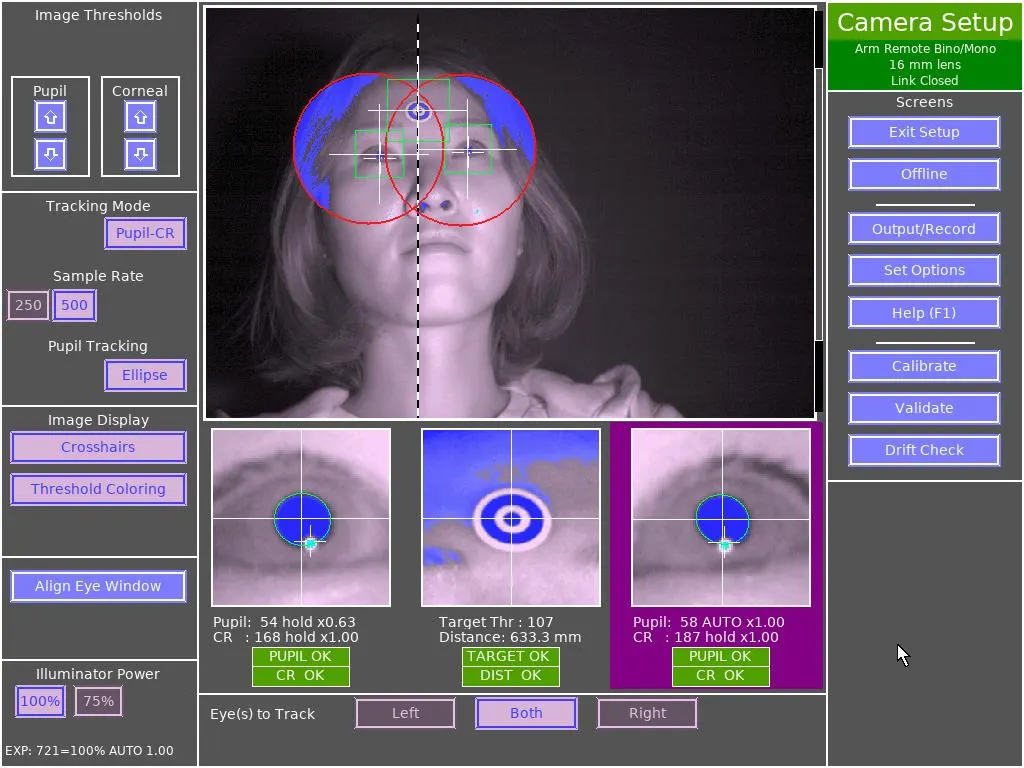
  2. Centre the head in the large camera view at the top of Camera Setup (1). If the face sits too high or too low, move the screen up or down on its arm rather than asking the person to crane.

  3. Check the distance under the sticker image (2). Aim for 500–700 mm; the example reads 633 mm. Move the chair or the monitor arm to get there.

  4. Check detection. The labels under all three close-ups should be green: PUPIL OK, CR OK, TARGET OK, DIST OK, and they should stay green, not flicker.

Camera Setup with the participant centred, target sticker detected, distance 633 mm, all labels green
Well positioned Face centred in the camera view, sticker found, distance 633 mm, every label green.
Ask the parent to sit back and hold the baby upright, facing the screen. If the baby slumps or leans in during the study, the distance changes and the image blurs: ask the parent to reposition, or move the monitor.
2.2

Get a sharp image

Key points
  • The tracker has no autofocus. A sharp image comes from the right distance and the camera focus.
  • Look at the target sticker close-up: its rings should have crisp edges. Adjust the camera's focus handle until they do.

Focus decides how precisely the pupil edge and the reflection can be found. In a blurred image the reflection smears into a soft halo and the pupil edge goes fuzzy, so the tracker's estimate jitters.

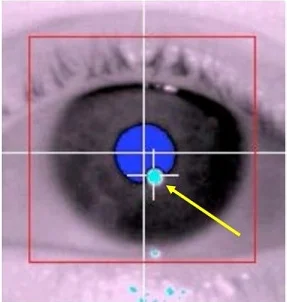
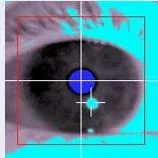
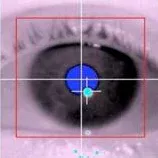
Sharp eye close-up: crisp pupil edge and a small, tight corneal reflection
✓ Good focus

Crisp pupil edge; the reflection is a small, tight dot.

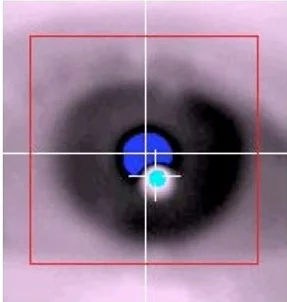
Blurred eye close-up: soft pupil edge and a smeared glow around the reflection
✕ Poor focus

Soft edges; the reflection has a bright halo around it.

If the image goes soft partway through a session, the participant has almost always moved closer or further away. Fix the distance first; only re-focus the camera if that doesn't help.

3Image thresholds

3.1

Reading the threshold display

Key points
  • There are two thresholds per eye: pupil (shown in blue) and corneal reflection (CR, shown in cyan).
  • The tracker usually sets them automatically. Adjust them by hand when the automatic values don't give a clean picture.
  • Each eye has its own thresholds, so you adjust them one eye at a time.

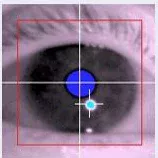
The bottom of Camera Setup shows a close-up of each eye. The camera picks out the pupil (a dark disc) and the corneal reflection (a tiny, very bright glint of the illuminator on the eye). Both need to be detected cleanly for accurate tracking.

Camera Setup with good thresholds on both eyes: blue covers each pupil, a small cyan dot marks each reflection, all labels green
Good thresholds Both eyes: blue fills each pupil, one small cyan dot each, all labels green.
#What it is
1Image Thresholds panel. The Pupil and Corneal arrow buttons raise or lower each threshold for the selected eye.
2, 3The two eye close-ups. Under each one: the current values (for example Pupil: 54, CR: 168) and the status labels. The selected eye has a purple background.
4Illuminator Power (100% / 75%). If the eye image looks dark and the pupil won't fill cleanly at any threshold, the eye needs more light: raise the power or bring the illuminator closer.
3.2

Tune the pupil threshold

Key points
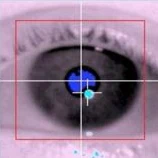
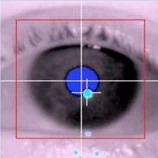
  • Goal: the blue area just covers the pupil, as one smooth, round patch, with no blue on the iris.
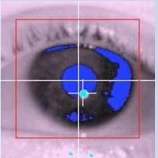
  • Blue spreading over the iris, eyelid or the whole image means it's too high: turn it down.
  • Blue that is small or patchy and doesn't fill the pupil means it's too low: turn it up a little.

The pupil threshold decides which dark pixels count as pupil. Select the eye, then press ↑ / ↓ (or the Pupil buttons) and watch the blue area change until it sits just over the pupil.

Reference close-ups

Pupil threshold too low: blue covers only part of the pupil
✕ Too low

Blue fills only part of the pupil. Turn it up.

Pupil threshold just right: blue fills the pupil exactly
✓ Just right

Blue fills the pupil and stops at its edge.

Pupil threshold too high: blue patches spread across the iris
✕ Too high

Blue leaks onto the dark iris. Turn it down.

On our host PC

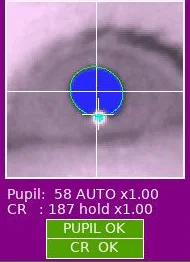
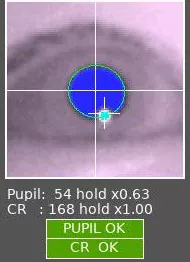
Eye close-up with blue covering only the pupil, labels PUPIL OK and CR OK
✓ Just right

Blue covers the pupil only. Pupil 58 · PUPIL OK.

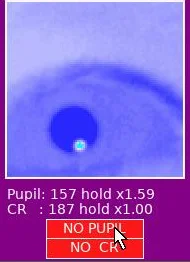
Eye close-up washed in blue across the whole image, labels NO PUPIL and NO CR
✕ Far too high

The whole image turns blue, so the pupil can't be picked out. Pupil 157 · NO PUPIL.

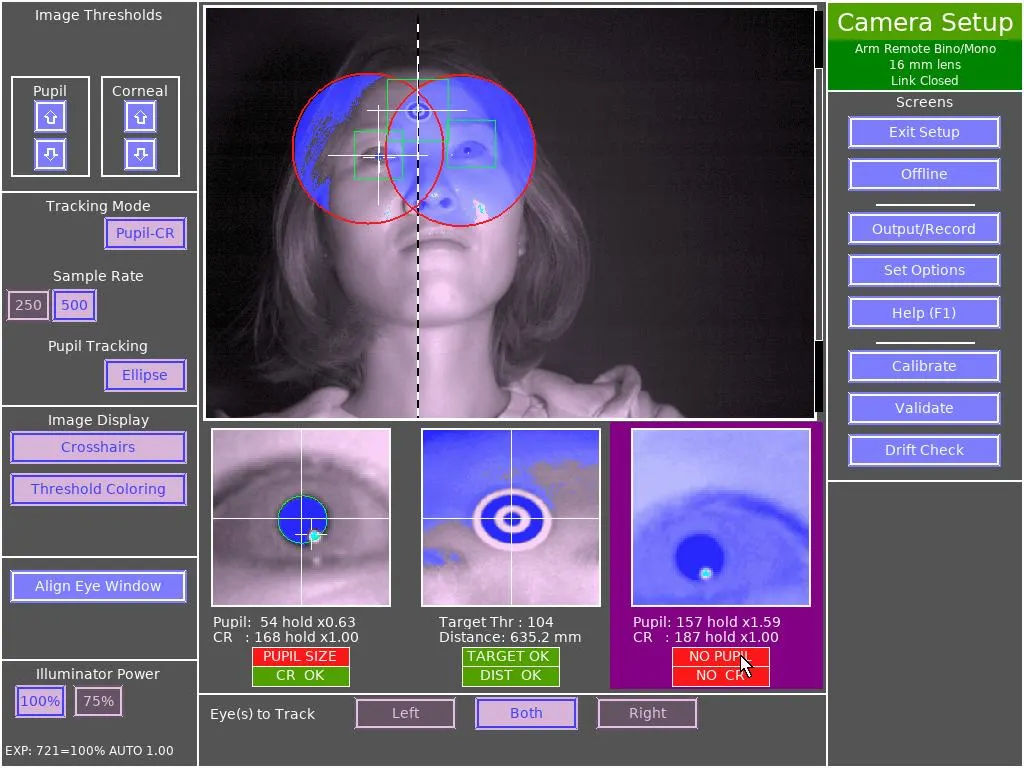
Full Camera Setup screen with the right eye's pupil threshold too high and the right-eye panel selected
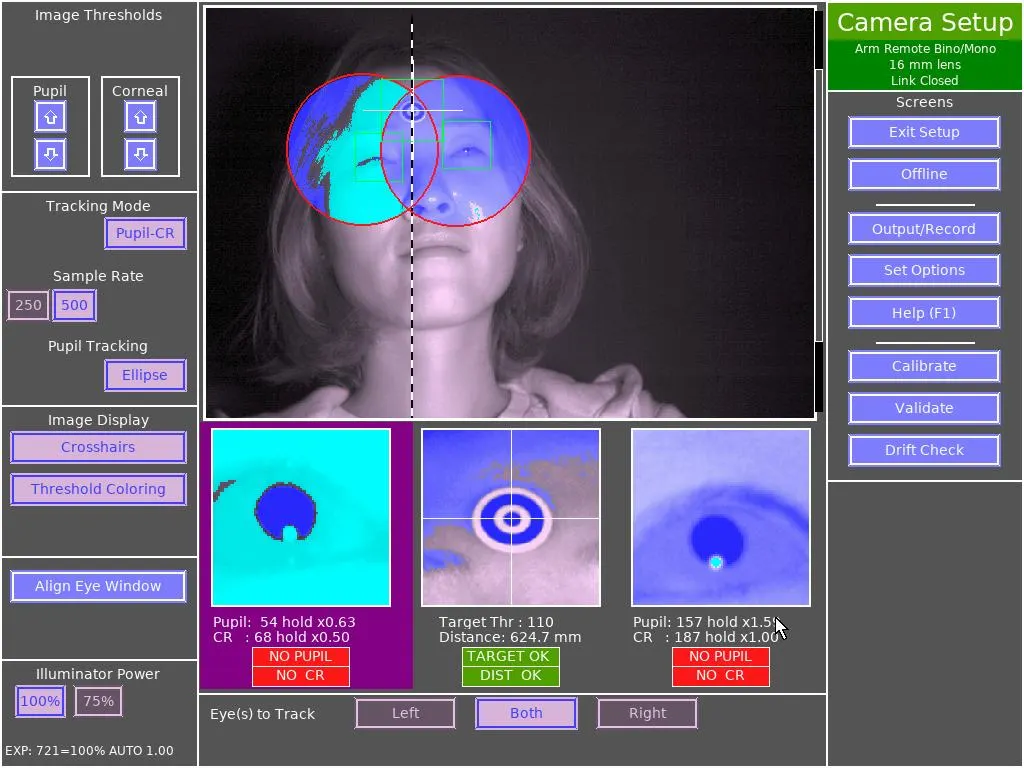
Too high Full screen for the last example: the right-hand eye is selected (purple), and blue floods its close-up and its half of the face image.
3.3

Tune the corneal reflection threshold

Key points
  • Goal: cyan marks one small, bright spot near the pupil, and nothing on the white of the eye.
  • Cyan spreading over large areas means the threshold is too low: turn it up. This makes the tracker grab the wrong spot and hurts accuracy directly.
  • Don't worry about the exact number, as long as it stays below 255.

The CR threshold decides which bright pixels count as the corneal reflection. Tune it after the pupil. Select the eye, then use the Corneal buttons (or + / −) until only the glint is cyan.

Reference close-ups

CR threshold too low: cyan spreads over the white of the eye and eyelid
✕ Too low

Cyan covers the white of the eye. Turn it up.

CR threshold just right: one small cyan dot
✓ Just right

One clean cyan dot beside the pupil.

CR threshold too high: the cyan dot shrinks to a pinpoint
✕ Too high

The dot shrinks and can drop out. Turn it down.

On our host PC

Eye close-up with a single small cyan dot below the pupil
✓ Just right

One small cyan dot. CR 168.

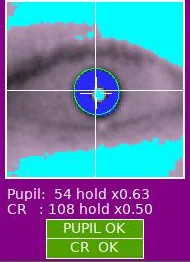
Eye close-up with cyan patches spreading along the lower eyelid
! Getting too low

Cyan creeps along the eyelid. CR 108. The label still says CR OK, but turn it up.

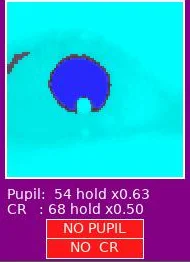
Eye close-up almost entirely cyan, labels NO PUPIL and NO CR
✕ Too low

Cyan floods the image. CR 68 · NO CR, and the pupil is lost too.

Don't rely on the green label alone. In the middle example the status still reads CR OK, but the cyan has already spread. Always look at the picture.
Full Camera Setup screen with the left eye's CR threshold too low and the left-eye panel selected
Too low Full screen for the last example: the left-hand eye is selected (purple), and cyan covers most of its close-up.
3.4

One eye at a time

Key points
  • We track both eyes at once, and each eye has its own thresholds.
  • The keys and buttons change only the selected eye: the one with the purple background.
  1. Select the first eye. Click its close-up at the bottom of Camera Setup. Its panel turns purple.

  2. Tune the pupil, then the CR, for that eye (3.2 and 3.3).

  3. Click the other eye and repeat. Make sure the purple highlight has actually moved before you press any keys.

  4. Check both together. Both eyes show green PUPIL OK and CR OK, and the pictures look like the good examples.

ThresholdKeyboardOn screen
Pupil (blue)↑ raise · ↓ lowerPupil buttons, Image Thresholds panel
Corneal reflection (cyan)+ raise · − lowerCorneal buttons, Image Thresholds panel
Tip: if one eye won't come right however you adjust it, recheck the configuration, the position and the focus before you keep tuning.

4Calibrate & validate

4.1

Why calibrate, and the keys

Key points
  • Everyone's eyes are different. Calibration teaches the tracker how this person's eye images map to screen positions.
  • Validation checks that the calibration is accurate. Drift correction checks it again during the study.
  • These three steps matter more than anything else for a successful eye-tracking study.

These keys work on the eye tracker preparation screen, before the experimental trials start:

KeyWhat it does
CStart calibration.
VStart validation.
ReturnAccept the participant's fixation on the current target, during calibration, validation and drift correction.
OStart the experimental trials.
Wait for STABLE. The status box at the bottom right of the Calibrate, Validate and Drift Check screens says MOVING (red) while the eyes move and STABLE (green) when they're still. Only accept a fixation when it reads STABLE.
4.2

Calibration

Key points
  • Both eyes must be tracked before you start: crosshairs on both eyes.
  • Accept each point with Return right after the eyes land on the new target.
  • At the end, the crosses must form the same shape as the targets: symmetrical, no outliers. If not, Restart.
  1. Press C. A target appears on the participant's screen.

  2. Watch the eyes in the preview strip at the bottom of the host screen. As soon as they move to the target and the status reads STABLE, press Return.

  3. A valid press moves the target to the next location. If a press doesn't register, press again.

  4. When all points are done, look at the pattern of crosses (one colour per eye). It should match the layout of the targets on screen. If it does, click Accept (or go straight to validation with V). If not, click Restart.

Is the calibration pattern good?

✓ Good · 5 points

An even plus shape, evenly spaced.

✕ Poor · 5 points

Lopsided, with a doubled centre. Restart.

✓ Good · 9 points

Straight rows and columns.

✕ Poor · 9 points

Skewed rows and a corner outlier. Restart.

Be fast. Infants lose interest in a target that sits in one place, but look quickly when it jumps somewhere new, so their first look is the best one. Press Return the moment you see the gaze shift. Aim to finish a 5-point calibration in about 5 to 10 seconds.
4.3

Validation

Key points
  • Runs like calibration: press V, then accept each target with Return.
  • Short white lines mean small errors. Aim for under about 1° at each target.
  • Both eyes must read GOOD before you start the study.

Validation shows the same targets again and measures how far the tracked gaze lands from each one. The host PC then reports the error for each eye in degrees of visual angle.

Validation result on the host PCSchematic of the Validate screen. Five targets, each with the left and right eye's gaze nearby and its error in degrees. Below, a green bar reports left eye 0.64 degrees average, 1.31 maximum, GOOD, and right eye 0.46 average, 0.99 maximum, GOOD. A status box reads STABLE. 1.300.98 0.570.45 0.480.23 0.430.44 0.570.60 LEFT Error: 0.64° avg, 1.31° max (GOOD) RIGHT Error: 0.46° avg, 0.99° max (GOOD) STABLE 1 2 3
Schematic A passing validation, redrawn from the Validate screen.
#What to read
1Each target (grey dot) with where each eye's gaze landed (cyan cross = one eye, violet = the other) and the error in degrees. The white line joins the target to the gaze: short is good.
2The summary for each eye: average and maximum error, and a verdict. Both must say GOOD (shown in green).
3Eye movement status. Accept each point only on STABLE.

If it's not GOOD

  • The participant looked carefully but the errors are large: the calibration is the problem. Redo calibration C, then validation V.
  • The participant moved or looked away during validation: the calibration may be fine. Redo just the validation V.
  • When both eyes read GOOD, press O to start the trials.
4.4

Drift correction

Key points
  • Happens at the start of trials, during the study, to confirm tracking is still accurate.
  • One target: accept with Return when the participant is looking at it and the status reads STABLE.
  • Large error that doesn't go away: redo calibration and validation.

A single target appears on the participant's screen and the host PC shows the Drift Check screen. It works like one point of calibration: wait until the participant fixates the target and the status reads STABLE, then press Return. An accurate drift check lets the study continue.

  • If the gaze lands far from the target (long white line), first get the participant to look at the target and try again.
  • If the offset stays, press Esc to leave the drift check and run a new calibration and validation.
Don't recalibrate without a reason. Calibrate once before recording, then use drift checks to monitor. Recalibrating when nothing is wrong risks swapping a good calibration for a worse one.

5During the study

5.1

Keep watching

Key points
  • Setup isn't done once the trials start. Watch the preview strip at the bottom of the host screen throughout.
  • If tracking slips, fix the position first: most problems are a participant who has moved.

During calibration, validation, drift checks and recording, the bottom of the host screen shows small previews of both eyes, the target sticker and the distance. Keep an eye on them and check that the participant:

  • ☐is still facing the monitor
  • ☐has both eyes tracked steadily (no red, no flicker)
  • ☐has their head near the centre of the tracking area
  • ☐is still 500–700 mm away. A big change in distance blurs the eyes.

If any of these slips, ask the participant (or parent) to adjust, or move the monitor. If accuracy has clearly dropped, recalibrate and revalidate at the next break.

Stay calm. It's normal for tracking to drop out briefly, especially with young children. Fix it calmly, without rushing the family.
5.2

Working with infants

Key points
  • Infants give you very little time. Do the setup during the opening cartoon.
  • Parents are your best help: tell them exactly what the tracker needs.
  • Be fast in calibration and validation, and keep watching the whole time.
  • Use the opening cartoon. Our programs start with a cartoon to keep the baby looking at the screen and still. That is your window for positioning, focus and thresholds.
  • Brief the parent. Explain that the baby should face the screen, stay upright, and not lean in or slump. Ask them to hold the baby steady, and to adjust when you ask.
  • Confirm fixations immediately. Accept each calibration, validation and drift-check point the instant you see the gaze shift to the new target. A 5-point calibration should take about 5 seconds.
  • Expect movement. Babies rarely hold one position for a whole study. Keep monitoring (5.1) and ask the parent to reposition, or move the monitor, whenever needed.
  • Stay calm. Distraction is normal at this age. A relaxed experimenter makes for a relaxed parent and baby.
5.3

Glasses and contact lenses

Glasses

  • Usually fine. The lenses can reflect the infrared light back as glare, which disrupts tracking if it sits on or near the pupil or the reflection.
  • A small tilt of the head up or down usually moves the glare away. Because people move freely in remote mode, glare can come back mid-session: keep watching.
  • If the tracker locks onto a reflection on the frame (mistaking it for the corneal reflection), ask a grad student about enabling Search Limits.

Contact lenses

  • Soft lenses (most daily and monthly lenses): no effect. Heavily tinted lenses can make the pupil hard to threshold, but they're rare.
  • Hard lenses often cause problems: they're small and move around, so the reflection jumps. If possible, ask participants who wear them to bring glasses instead.

✓Checklists & resources

✓

Checklists & resources

Pre-session checklist

Tick these off at the host PC. They reset when you reload the page.

Before you run a study on your own

Make sure you can do all of these. If not, ask a grad student to practise with you.

  • Explain the eye tracker to a participant or parent in everyday language.
  • Name the three things that most affect tracking quality: distance, sitting position, and focus.
  • Adjust viewing distance, head position, camera focus and image thresholds.
  • Run calibration, validation and drift correction, read the results, and decide whether to redo them.
  • Spot problems from the tracking display (distance, blurry eye images) and fix them.
  • Handle a software crash, and an infant who becomes inattentive or fussy.

Further reading

Click anywhere or press Esc to close